Claims Based Authentication for SharePoint 2010–Part II
In my previous post, I talked about how to enable Claims Based Authentication. In this post, I’ll talk about one more aspect of it – Forms Based Authentication (FBA). FBA can be helpful for creating internet facing, public sites which can be accessed by millions of users who can’t be part of your Active Directory infrastructure.
ASP.NET when launched supported 3 types authentications namely: Windows Authentication(better for Intranet scenarios and credentials are stored inside Active Directory), Passport Authentication (Now Live ID Authentication, can be used via Claims Based Authentication) & FBA(where user data is maintained inside SQL Database). ASP.NET 2.0 provided some tools and classes and made FBA much more simpler. It automatically created required tables, stored procs, UI to manage Users (Membership Providers), their access rules by their roles (Role Provider) and store some more data about users (Profile Provider).
These tools and classes are available within SharePoint Server. To configure SharePoint for FBA follow the steps mentioned below:
STEP01: Creating a database and schema for FBA
First create a blank database in SQL Server Management Studio (e.g test1.tendulkar.db). To configure this database with FBA, run command prompt at elevated privileges an run following command:
C:\Windows\Microsoft.NET\Framework\v2.0.50727\aspnet_regsql
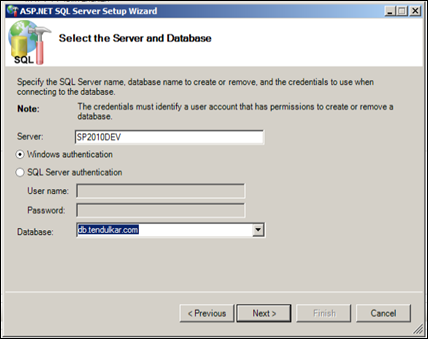
This will open up a ASP.NET SQL Server Setup Wizard. Here click next and choose ‘Configure SQL Server for application services’. Now, the window will look something like below:
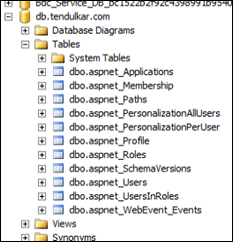
This process will create all the required tables, views, stored procedures for above mentioned providers.
STEP02: Configure FBA inside IIS
Execute start –> run –> inetmgr
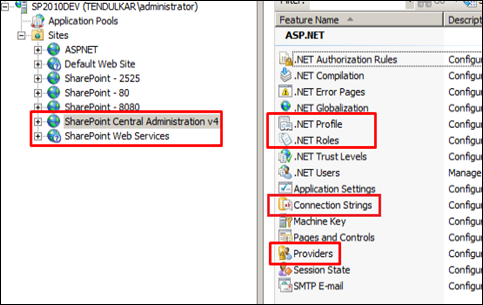
Here, you’ll see different web applications along with ‘SharePoint Central Administration’ and ‘SharePoint Web Services’ application. Please note highlighted sections.
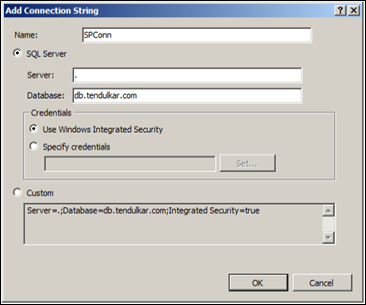
In SharePoint Central Administration first add Connection String. You’ll see a window something like below:
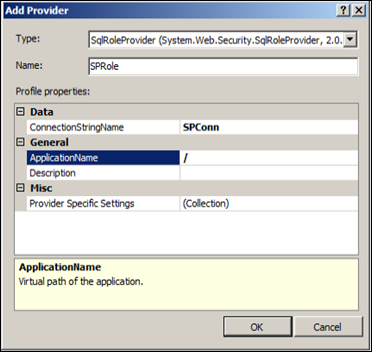
After that, in Providers, add Roles Provider and for that matter, you should get following window
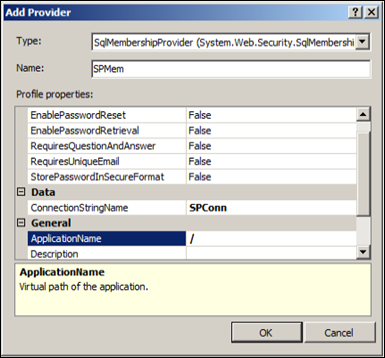
Now, add Membership provider and window will look like image mentioned below
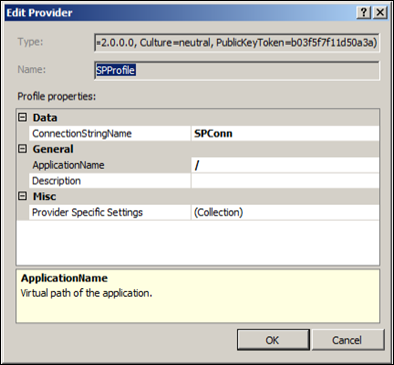
Now, add Profile provider
Repeat this process for SharePoint Web Services web application as well.
STEP03: Enable FBA for Web App
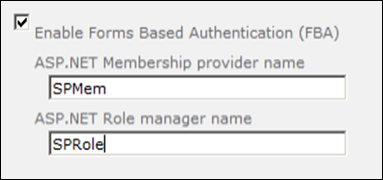
When you created Web Application, if you’ve selected Claims Based Authentication, go back to SharePoint Central Administration and select your Web Application. On ribbon, click onAuthentication Providers and select Default. This will bring in your Web App settings window. Here, pass-on our just configured providers.
Now repeat the step (02) of creating Connection, Role Provider, Membership Provider and Profile Provider for this application in IIS.
Remember, these providers needs to be present at 3 locations, i.e. a) Central Administration, b) Web Services and c) your Web App
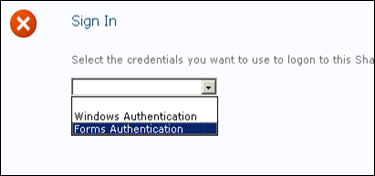
Now, create roles and users for this application inside IIS. Once you’re done with it, create site collection for Web App. After you create a site collection and navigate to browsing, it will give following options:
It will bring in the default sing-in page. Provide your use credentials and log in. Once you log-in you’ll be able to see the custom FBA login name at top.
I hope, this will help you to get started. In my next post we’ll go deeper into this FBA stuff and also we’ll try Claims Based Authentication using Trusted Identity Providers.

Comments
Post a Comment